Scenes and Nodes
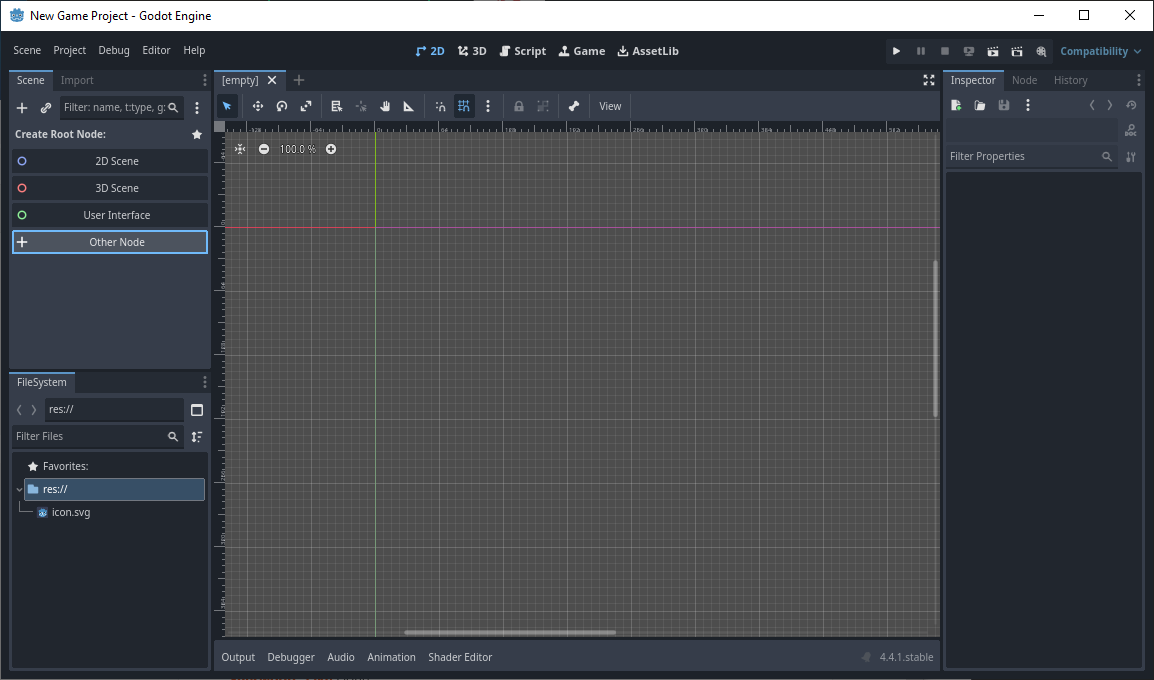
You might have noticed that I used the word “scene” in the last section and asked yourself ‘What is a scene?’ It’s similar to a stage for a play where you put your backdrops and your actors. Since this is a brand new scene, you will see it’s tab name as [empty]. This implies the scene hasn’t been saved yet, which we will get to very soon. First, lets add a new Node to our scene by clicking on the Other Node option in the left side pane.
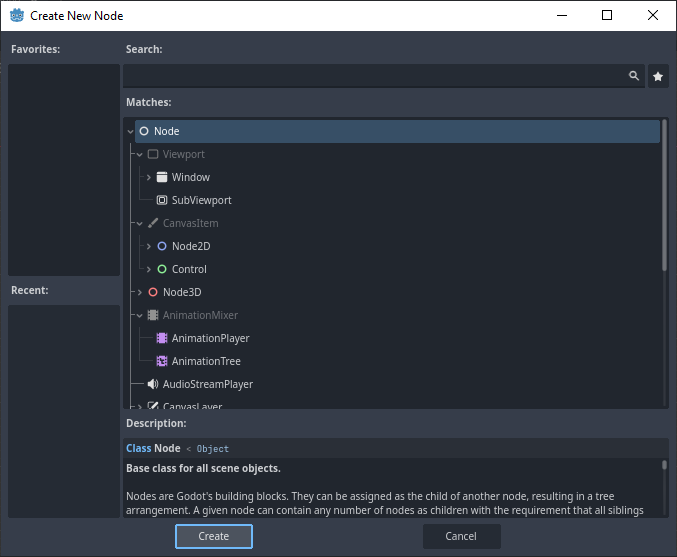
Now, the other options can be used for a new node as well, but this node will be special: it will be our main stage. I’ll explain this later when we discuss game design, but a basic Node is a good place to start building our scene. When the Create New Node window opens, look in the Matches list to find a gray Node, which will likely be at the top of the list. Click Create to add the new Node to the scene.
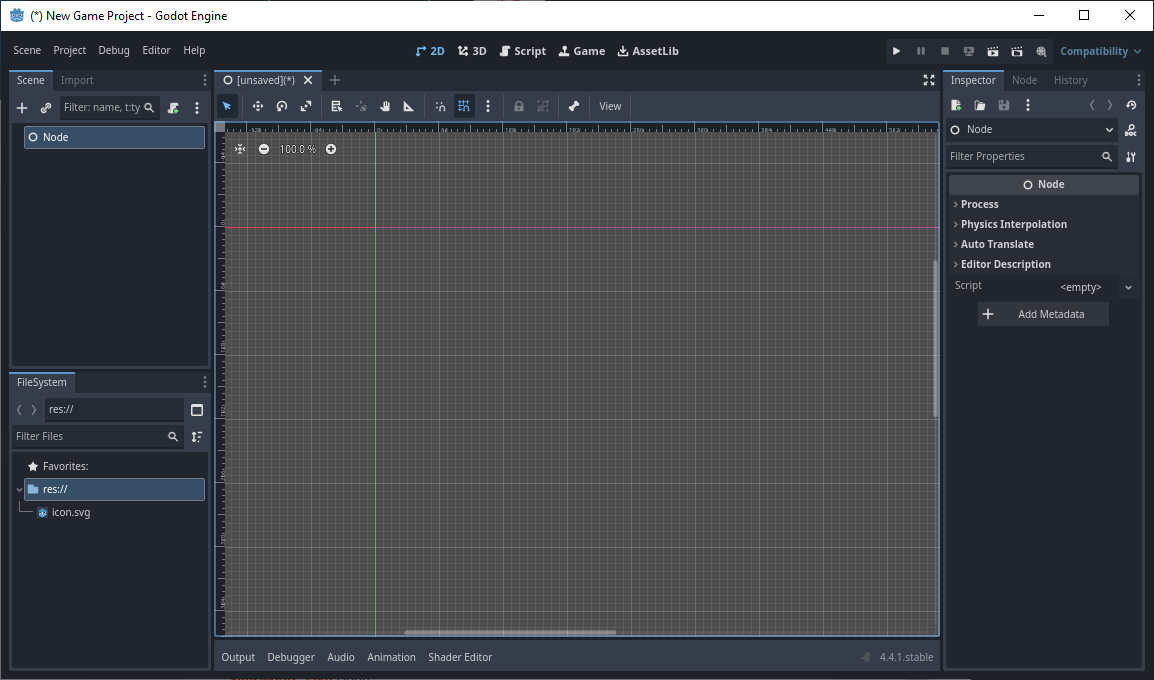
You will see the node added to our scene in the left pane. Since the scene is no longer empty, you’ll see the tab name of the scene change from [empty] to [unsaved](*) in the Scene window. The (*) lets you know if the scene has been saved or not. Once it is saved, the (*) will vanish from the tab name.
From here, we can build our node trees.
What is a node tree?
A node tree is just a tree of nodes, where child nodes inherit some properties of the parent node, such as position and process_mode. The details get a little murky because you can mix many types of nodes, but most with bizarre results. To keep things simple: keep blue nodes with blue, green nodes with green, red nodes with red, and gray nodes with any of these.
Since we started with a gray node, we can use the other colors of nodes as children of the gray node. Let’s give this special node a proper name: right click on the Node in the scene tree to open a context menu and click Rename.
Rename this starting node to Main.
Let’s go ahead and save this scene with our Main node now. You can save a scene by using the Scene menu at the top left corner of the engine window. Click Scene > Save Scene As…
The Save Scene As… window will open. Notice two things here: The Path that the new scene will be saved to (at the top) and the name of the scene it will be saved as (at the bottom). Keep these as is for now. When the project grows, we’ll discuss directory organization and best practices when working in Godot. Click Save to save the scene.
Our scene now has a name! Also, in the FileSystem pane at the lower left, you’ll see it become part of our project with the extension of the name tscn. I don’t know why the extension is tscn, but I think it could be short for Godot scene. Regardless, it is now in your res:// folder in your project.
Before we can test it, we need to set it as the Main Scene. To do this, right click on the main.tscn file and select Set as Main Scene. This tells Godot what scene to start the game with. The starting scene will change color in the FileSystem pane.
Now that our Main scene is set up, we can begin to add a child node to our Main node. Right click on the Main node in the Scene pane and select Add Child Node… Use the Search box at the top of the Add Child Node window to fine the green Label node.
If you are wondering what the Label node is for, take a look at the Description near the bottom. This will be useful for beginners who want to experiment with new node types. Create the Label node and it will be added to our scene tree under Main.
Since this is a green node type, you’ll usually seen handles appear around the node in the scene. This helps you resize the node to whatever you need, but for now we’ll leave it as is.
What we want to do is look under the Inspector pane, then locate the field named Text. It is empty. Click inside this empty field and type the words “Hello world.” without the quotations. It will show the text inside the node’s handles in the scene.
Click anywhere in the empty area of the scene and the Label node will be seen as-is without the handles.
Running and Debugging the Game And now for the moment you’ve been waiting for: Let’s start the game! In the upper right corner of the engine’s window, look for the Run Project button, which looks like a play button you find almost anywhere else. If you have trouble locating it, hovering over the icon will display a tool tip and it’s keyboard shortcut button. In this case, the button is F5. You don’t have to memorize any of the keyboard commands for the tutorial, but at some point you might get tired of using the mouse all the time, so it’s worthwhile to learn them if you find them important. F5 happens to be one of my favorite ones.
A new window will appear displaying the title of your game with (DEBUG). The game is now running!
Not as exciting as your hoped it to be, huh? This is the point in the tutorial where I need to be real with you: Game development requires a lot of dedicated time and patience, especially if you are a beginner. You may have spent a long time following this tutorial, word by word, to get to this point; and that’s the reality of everything game development. However, you might feel the opposite: You might be ecstatic to see “Hello world” on your screen! Developing games is rewarding, and it’s why the industry goes strong, especially in the indie developer realm. Hopefully, you have a taste of this satisfaction. There is one more thing I need to discuss before we get more involved in this project.
Scripting and the Console To have true interactive experiences in your games, you will need to learn scripting. By extension, you’ll also learn some algorithmic thinking to code your own solutions to problems. One of the biggest allies for a game developer is the Console window. It will help you debug the many issues that will arise in your project. Don’t sweat it! Issues of all kinds is normal to run into, and as you resolve one issue, you can resolve many more. This is a skill-based system: You get better by using the skill. Reference your console frequently. Let’s use a little bit of scripting to print a message to our console window. Right click the Label node in the scene pane and select Attach Script…
The Attach Script window will appear.
For this tutorial, I’m going to stay with GDScript for the language since it is the easiest to learn in Godot. Leave the other options as is, and look at the green message text in the lower field of this window. • Script path/name is valid. This means that there are no conflicting paths or names in the FileSystem. Being this is our first script, I did not expect any conflict to happen. But if they do, consider renaming the script by changing it in the Path field above, always keeping the res:// at the beginning and the .gd at the end. • Will create a new script file. This message can change whether or not the script already exists in the Path. Pay attention to this message because you DON’T want to accidentally attach a script to the node that you didn’t mean to! (I will show you how to detach scripts later tho, so it’s not incredible important right now.) Click Create when you are ready. Notice that at the top of the engine’s window it now highlights Script mode. In the middle pane, you will see the text “extends Label” with some line numbers to the left. This is the Script window.
Looks scary, huh? Remember, nothing ventured, nothing gained! You might have been intimidated by rumors that Godot and GDScript is hard to learn. I won’t lie: it does have a steep learning curve if you have never used open source software before. Without the backing of a financially supported department, the documentation may feel all over the place, things are not as straightforward, and what works for one developer may not work for another developer. Don’t this intimidate you—where there is a will, there is a way. However, there are many, many resources to learn Godot, most just a search engine away. I won’t go into detail about this since we are getting our feet wet, but you can post questions on the official Godot Forum at forum.godotengine.org. I will bring it up again later, but for now, know that you are not alone in the journey to mastering Godot. If you stick with it, you’ll be able to make more games and even help others with theirs! You can switch back to 2D mode by clicking the 2D button at the top of the engine’s window. Go ahead and switch to that mode, then back to Script.
Now it is type for scripting. Let’s fill in the script with the following code, after the extends Label line:
func _ready() -> void:
As you type, you might see a Suggestions window appear like this where you are and the line turn red. Don’t let this frighten you, because it will change as you type. It is a very useful tool for new scriptwriters because you can follow the syntax of the suggestions as a guide, or press Tab to autocomplete the line of code. If you are starting out, please avoid using autocomplete and type it out. This will help you internalize some of the common functions and structures in Godot. (Never underestimate the power of muscle memory!)
Complete the code and press Enter to move to a new line. When you do this, it will automatically indent the next line. This happens after any line that ends with a : symbol.
The line is still highlighted in ready, but that’s because we need to fill in the rest of the code. Type the following on the new line:
print(“Hello world!”)
You’ll see the read line vanish now that the code is complete.
You can probably guess what this code will do, but it is for a purpose. Since we have finished our changes, you can save the script by clicking on File>Save in the script’s menu bar. Even though we saved the script, we need to re-save the scene using Scene>Save Scene in the engine’s menu bar.
Run the game now using the play button or the F5 key. But move the game window out of the way and look back at the bottom pane of the game engine. Do you see the text “Hello world!”?
You can offset your game engine, or editor, window so you can see the message appear as you press the Run button.
When the game is running, you can print messages to the screen from writing those messages in your scripts using the print() function! This function is one of the most powerful and helpful functions you can learn. Advanced coders coming from other languages may roll their eyes at this because the print function is almost universal, but little know how valuable this function is in debugging. We will do more with it later in the tutorial, but for now, this is all we will do with it. This may be a lot to take in. If you make a mistake at any point, the editor will not hesitate to let you know! For example, if I deleted the closing parenthetical ) in that last code in the image and tried to run it, it will “throw a fit.”
The game will freeze, so we’ll need to stop it from running using the Stop button to the right of the Run button in the editor. But before we do that, notice that your Console switches over to Stack Trace. This is a debugging tool to help you hunt down pesky bugs. I will discuss this later in the tutorial. But for now, I’ll correct my mistake by putting the closing parenthetical back in.